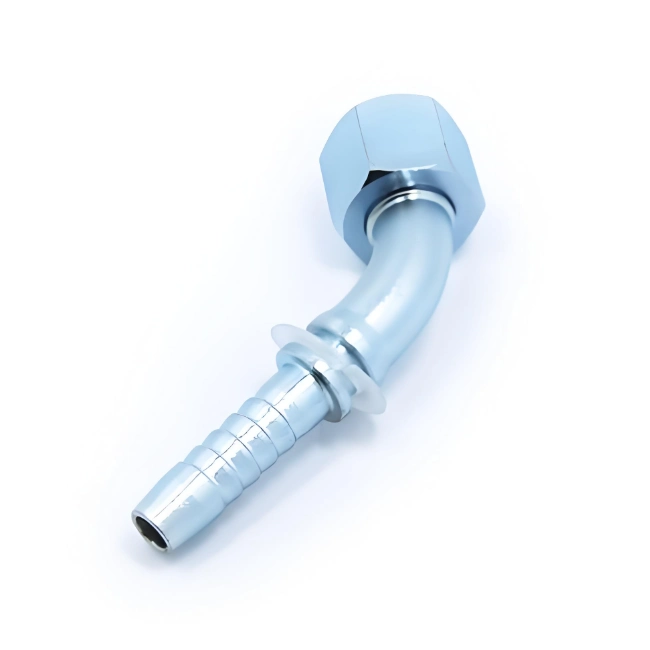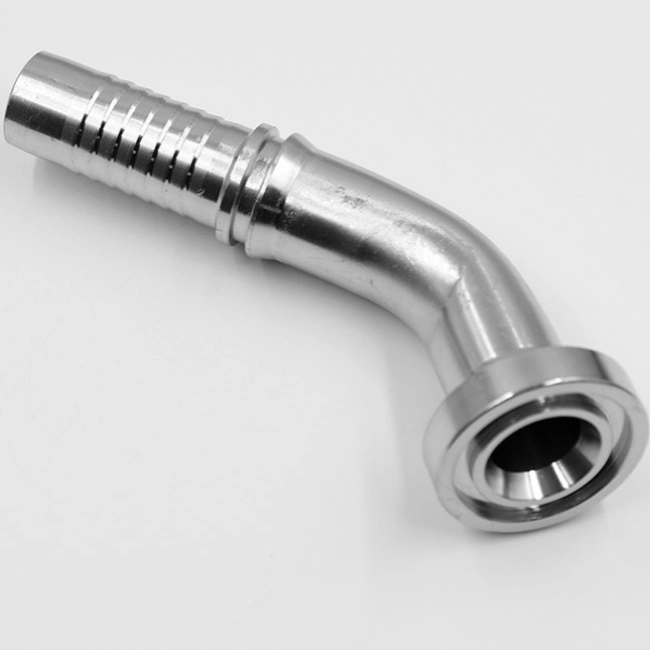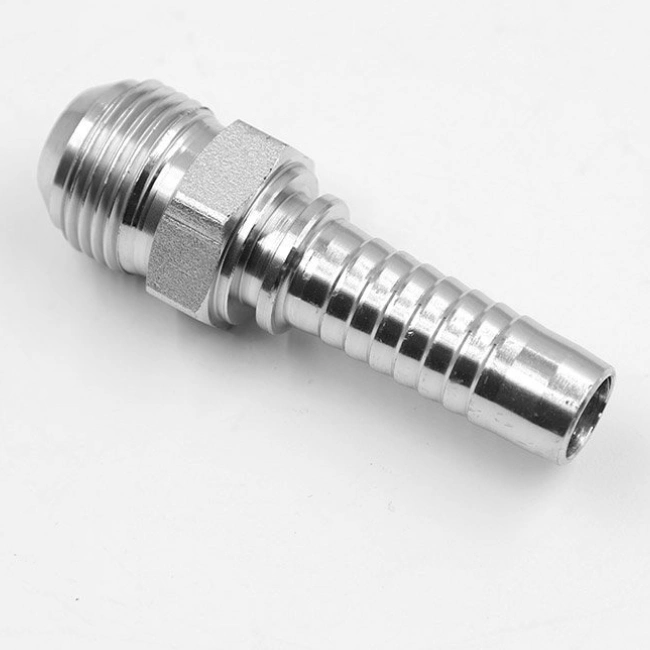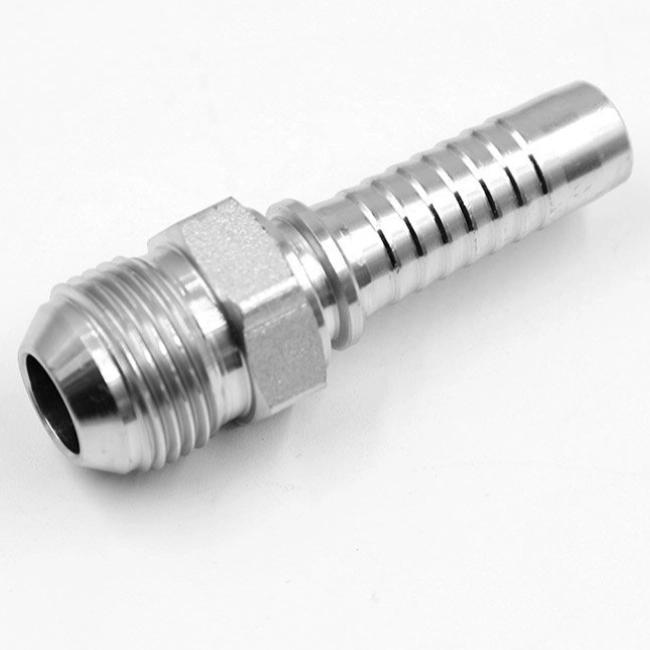
JIC (Joint Industry Council) connection fittings (usually 37° flared or non-flared) are widely used in hydraulic and pneumatic systems, and their sealing principles and installation considerations, as well as common problems in use are listed below:
Sealing principle of jic connection fittings:
The core sealing principle of Jic connection fittings is the metal-to-metal line contact (Line Contact):
- Tapered fit:
Jic connection fittings consist of a nut with a 37° external taper, a 37° internal taper in the fitting body and a preformed 37° tapered sealing surface (tube end flare or non-flare ferrule).
When the nut is tightened, the 37° taper of the tube end is pressed into the 37° inner taper of the fitting body, forming an annular line contact. - Elastic deformation and cold flow effect:
Under the action of the tightening force, high pressure is generated at the contact line (local stresses far exceeding the system pressure).
The microscopic projections on the metal surface are flattened and slight plastic deformation (cold flow) occurs, filling the microscopic gaps and forming a leak-free sealing zone. - Formation of the sealing zone:
Line contact expands into a narrow sealing band (about 0.2~0.5mm wide), relying on the elastic deformation of the metal to adapt to vibration and temperature changes. - Self-tight sealing characteristics:
The higher the system pressure, the greater the sealing surface compression force, the stronger the sealing effect (pressure-assisted sealing).
Jic connection fittings sealing key points: sealing relies on precise 37 ° cone angle machining accuracy and surface finish (usually Ra ≤ 0.8 μm), roughness or scratches will lead to leakage.
Jic connection fittings installation:
To avoid leakage and damage to the fittings, the following steps should be strictly followed for installation:
Pre-installation check
Cleanliness: Clean the fitting taper, threads and inside of the line with a lint-free cloth to ensure that there are no metal shavings, oil or grease.
Damage Inspection: Inspect the taper for scratches and dents (minor damage requires replacement).
Match: Verify that the fitting matches the line size (JIC 37° standard) and pressure rating.
Pipe Preparation
Cutting: Use a professional pipe cutter to cut vertically, making sure the end of the pipe is flat and free of burrs.
Deburr: Use a reamer or file to deburr inside and outside walls to prevent debris from entering the system.
Flare (if applicable):
Use special flaring tools to ensure that the flare angle is exactly 37°.
Flare surfaces should be smooth, free of cracks, and of uniform thickness (typically 80% of tube wall thickness).
Assembly steps
Sequence: Insert the nut and sleeve (if any) into the line and then into the fitting body.
Align threads: Manually tighten the nut until it encounters resistance, making sure there are no misalignments.
Tightening torque:
Do not over-tighten! Use a torque wrench in accordance with standard operation (see table below).
Typical tightening steps:
- Hand tighten to fit;
- Tighten 1/4 to 3/4 turn with a wrench (or refer to manufacturer’s torque values).
| Pipe Diameter (inch) | Recommended Torque (N-m) | Number of Tightening Turns (Ref.) |
| 1 / 4 | 15~20 | 1/4~1/2 |
| 3 / 8 | 35~45 | 1/2~3/4 |
| 1 / 2 | 55~70 | 3/4~1 |
jic connection fittings key issues
Sealants are not allowed: Tapered seals do not need to be taped or glued, as this may contaminate the system or damage the sealing line.
Do not reuse severely deformed parts: if the taper is indented or deformed after disassembly, it must be replaced.
Prohibition of direct clamping of the fitting body with pipe wrenches: a double wrench should be used (one to hold and one to tighten) to avoid distorting the fitting.
Test and Review
Pressure test: Gradually increase the pressure to 1.5 times the working pressure, hold the pressure for 5 minutes, check the leakage.
Tighten twice: for minor leaks, loosen and re-torque (one attempt only).
Jic connection fittings frequently asked questions
Jic connection fittings leak (most common problem):
Damaged taper: This is the most common cause of leaks. This is the most common cause of leaks:
Overtightening: The metal taper (male connector taper or female connector seat) is deformed, crushed or cracked by excessive force.
Insufficient tightening: insufficient torque is applied and insufficient metal-to-metal sealing contact is made between the tapers.
Contamination: Foreign matter such as dust, sand, metal shavings, etc. is trapped between the taper surfaces and prevents sealing.
Scratches or knocks: The taper surface is scratched or dented by tools or other hard objects before or during installation.
Material fatigue or corrosion: Long-term use or exposure to corrosive media causes deterioration of the taper surface.
Damaged threads: Damage to the male connector threads or female connector female threads (e.g., messy buckling, slipped teeth) that prevents proper tightening or sealing.
Cross-threading: Damage to threads by forcing them in without aligning them during installation.
Mismatched or incorrect sealing surfaces: The wrong type of fitting is used (e.g. JIC fittings are used to connect SAE/ORFS flat fittings by mistake), or the male connector taper angle does not match the female connector seat taper angle (although the standard is 37°, worn or poor quality products may not match).
Vibration loosening: The nut gradually loosens due to severe system vibration.
O-Ring Failure (if applicable): Some JIC fittings are designed with a secondary o-ring at the root of the nut or fitting body. the o-ring may fail due to deterioration, permanent deformation in compression, extrusion, or chemical corrosion.
Jic connection fittings are difficult or impossible to tighten:
Cross-threaded: Threads were not aligned during initial installation.
Damaged threads: Threads are burred, jumbled, or clogged with foreign material.
Taper not aligned: High stress in the line or fitting itself prevents the male fitting from inserting smoothly into the female seat.
Wrong size or type of fitting used: Male and female fittings do not match in size.
Jic connection fittings are difficult to remove:
Overtightening: Installation is too tight, resulting in “seizure”.
Corrosion: Electrochemical corrosion of dissimilar metals in contact (e.g. steel and stainless steel) in certain environments, leading to adhesion.
Cold welding of conical surfaces: Microscopic fusion between conical surfaces of metals can occur at high pressures and temperatures (less common).
Space constraints: Small mounting locations where tools cannot be utilized.
Jic connection fittings Cracked/broken fitting body or nut:
Material defects: casting or forging defects in the fitting itself.
Over-tightening: Applying torque far in excess of recommended values, resulting in material overload.
Fatigue Failure: Metal fatigue due to prolonged exposure to pressure pulsations or vibration.
System Pressure Shock: Water hammer or other pressure spikes exceed the rated pressure of the fitting.
Low Temperature Brittleness: Material toughness decreases at very low temperatures.
Jic connection fittings are contaminated with fluid:
Failure to clean prior to installation: Processing debris, cutting powder, sealant debris, etc., remaining inside new fittings or lines after repair.
Inadequate flushing of the system: Replacement fittings or repair without adequate flushing of the system.
O-Ring Debris: Failed O-Ring debris enters the system (if fitting is equipped with an O-Ring).
Jic connection fittings identify confusion:
Confusion with SAE 45° fittings: jic 37° tapered fittings can be easily confused with SAE 45° tapered fittings in appearance (especially the nut), but the two are not compatible and forcing them to be used together can result in leakage or damage.
Jic connection fittings solutions & preventive measures:
Jic connection fittings preventing and resolving leaks:
Proper Installation Torque: This is the most critical point! Always consult the recommended torque values provided by the manufacturer and use a calibrated torque wrench for tightening. Over-tightening by feel or using an adjustable wrench is strictly prohibited. In case of under-tightening, tighten to standard torque.
Clean: Before installing, thoroughly clean male and female fitting seat tapers, threads, and o-ring grooves (if applicable) with a lint-free cloth and cleaning solvent (such as isopropyl alcohol). Make sure no grease, dirt, or old sealant remains. Keep the work area clean and free from foreign objects during installation.
Careful Inspection: Carefully inspect the taper and threads for any damage (scratches, dents, cracks) before installation. If damaged, replace immediately.
Avoid cross-threading: Preassemble by hand, making sure that the male connector threads are easily and smoothly screwed into the female connector several turns before tightening with a tool. Stop and check immediately if you feel an abnormal increase in resistance.
Correct Alignment: Ensure that piping runs in a natural direction and that fittings are not forced or twisted. Use elbows or hose transitions, if necessary, to eliminate installation stress.
Use proper sealing (caution): For slightly damaged tapers or low-pressure non-critical applications, follow manufacturer’s recommendations closely and use a very small amount of the specified type of taper thread sealant (not pipe thread sealant!). applied to the male connector threads (away from the taper) as a last resort. However, metal-to-metal sealing is the preferred method of design, and sealants are not routine practice and may present a risk of contamination. Never apply sealant to the tapered surface!
Inspect and replace O-rings: If the fitting is supplied with O-rings, inspect and replace them with new O-rings of the correct size and material (which need to be compatible with the fluid) after each disassembly. Apply fluid-compatible grease.
Anti-loosening measures: In vibrating environments, consider anti-loosening measures such as locknuts, Loctite® threadlocker (use the correct type), cotter pins, or lockwashers. Check tightness periodically.
Replace damaged parts: Parts with severely damaged tapers, damaged threads, or cracked fitting bodies must be replaced. Do not attempt to repair.
Jic connection fittings solve tightening difficulties:
Realign: Fully loosen and manually realign threads to ensure smooth screw-in.
Inspect and clean threads: Remove burrs or foreign material with a wire brush or thread comb.
Stress Relief: Reduce bending or torsional stresses on fittings by adjusting line support or alignment.
Verify specifications: Double-check male and female fitting sizes (e.g., -6, -8) and types (JIC 37°).
Jic connection fittings resolve disassembly difficulties:
Use the right tool: Use a good quality open-end wrench or wrench that is the correct size to avoid slipping and damaging the corners of the nut. A socket wrench is better.
Lubricate properly (before disassembly): If slight corrosion is suspected, drop a penetrating loosening agent (such as WD-40) on the threads and wait a while before trying again.
Increase leverage (with caution): Add sleeves to the wrench to increase the force arm, but be very careful to avoid damaging fittings or neighboring parts. Prefer longer wrenches to added sleeves.
Heat (extreme): Use a heat gun to apply even, moderate heat to the nut area (avoid overheating which could cause material properties to change or ignite nearby oils) to help loosen using thermal expansion. Use only experienced personnel and be safe.
Cutting (last resort): If all else fails, replace the nut or fitting body only by carefully cutting it.
Jic connection fittings prevent fitting breakage:
Strictly observe torque specifications.
Use reliable, standardized fittings.
Ensure that the system is properly designed to avoid pressure shocks (e.g. use of accumulators).
Use materials suitable for low temperatures (e.g. 316 stainless steel).
Jic connection fittings prevent fluid contamination:
Thoroughly clean all new fittings and lines before installation.
Flush the entire system after servicing, following strict procedures.
Use clean seals and grease.
Jic connection fittings avoid confusion:
Familiarize yourself with the appearance of the fittings: JIC nuts usually have a hexagonal shape with a raised shoulder (near the threaded end), whereas SAE 45° nuts usually have a flat hexagonal shape without a raised shoulder (similar to AN fittings). Look carefully for markings, if any.
Use a fitting identification card or manual: Carry a fitting type identification card or consult a manual for comparison.
System Standardization: Whenever possible, use JIC fittings consistently throughout a system to avoid mixing.
Most problems with JIC fittings stem from improper installation (especially torque problems), contamination, damage, and vibration. Following installation practices of cleaning, inspection, alignment, proper torque, and regular maintenance inspections are key to preventing and resolving these problems. When leakage or damage occurs, the first step is to check the condition of the taper and threads and re-torque or replace damaged parts to the exact recommended torque. Remember: The “better tight than loose” rule is fatal to JIC fittings! Precise torque is a guarantee of reliability.
Jic connection fittings summary
The reliability of JIC fittings depends on precise 37° taper machining and standardized installation. The nature of the seal is a wire contact formed by the elastic deformation of the metal, so violent tightening or surface damage must be avoided. Strict adherence to the manufacturer’s torque standards, cleanliness, and the use of specialized tools will ensure that fittings seal over time in high-pressure, vibrating environments. If leakage is frequent, check the quality of the taper and the installation practice as a matter of priority! If you have more related questions about Jic connection fittings sealing and installation, please contact our technical engineers, it will be free for you to answer.